1. Zip Code To Map
Want to easily see on a map where in the country a driver is located? In a driver’s subject record, click on that driver’s zip code and Google Maps will open in a new tab showing the area in question, keeping your original work open in the tab you were using before.


2. Tagging and Tag Categories
Using tagging for your subject records makes it easy to track useful information about your applicants and hires. The best thing about tagging is that you can set it up however it would be most useful to your company since it’s designed to make the information you want to track searchable and reportable. If you’ve ever wished you could search for something, it would be a great candidate for a tag – examples of popular tags include hire date, orientation date, and orientation location. Tags can be found by clicking the Tagging button on a subject record and scrolling down to see all available tags that can be applied to a subject. For roles in your company that don’t need access to all possible tags within the system, primaries can create tag categories to filter for their own tasks (for example, tags related to recruiting or safety). Tag categories keep the focus on tags that are important to you.3. Auto-Population and Worklist Tagging
Tags become even more powerful when they’re combined with automation. You can set up tags to auto-populate based on questions from a driver’s application and also set up auto-tagging based on the worklist a driver is assigned to, making your information even more searchable and easy to use.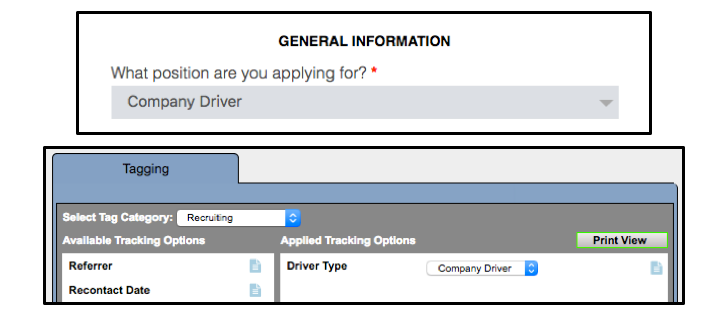
4. Document Categories
Storing candidate and driver documents electronically saves you plenty of time and paper. But keeping your paperwork organized is still important. A subject’s documents can be sorted into categories like General, Xchange, or DQF to make documentation simpler – think of them as the manila file folders that keep things easy to find. You can add any categories you find useful and move documents between categories as needed to keep your paperwork working for you. You’ll find each category shows up under a subject record’s document view as a separate header.5. Search and Quick Search
Our advanced searching options make it simple to locate the drivers in your system who fit any variety of criteria and to pull lists of relevant employees or candidates that meet your needs. Enter as many search parameters as you wish by using the fields and click the reset button to clear the fields out. You can even search by tags you’ve created (see above). If you find yourself repeatedly running the same searches (for example, a list of drivers with an upcoming orientation date), you can create a quick search that saves a set of selected fields for repeated use – just fill in your search variables, give your search a name, and click Save at the bottom of the menu to save your quick search for future use.6. User Preferences
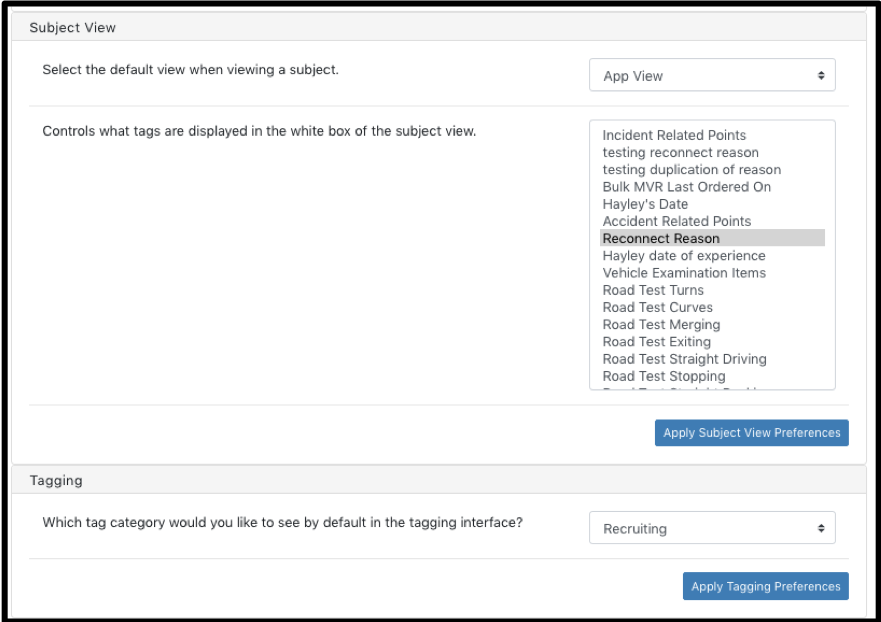
Primaries and non-primaries alike can customize their individual preferences to make the system work for them. By opening your Settings menu, you can access the My Preferences menus and change certain settings for Xpress, Xchange, and the User Interface to match how you use those tools. Some popular user preferences to customize are hiding the tag search from the search screen, choosing a different default view when a subject record is opened, and altering the reminders received within the Xpress Dashboard. Find these under Settings in your Profile.
7. Import Tool
Getting leads from a variety of sources can make it hard to assess all your candidates in the same system. That’s why we created the Import Tool to make it simple to pool leads from outside sources into your dashboard for assessment. The Import Tool can be found in your Tools menu and lets you create a link directly to your Facebook or Hubspot accounts, or you can upload a .CSV file with your leads.
8. Homepage Reports and Focus View
Even though your homepage reports might show up front and center when you first log into the system, it’s easy to forget how much useful information is at your fingertips from the first moment you enter Tenstreet’s dashboard. Homepage reports can be customized to what you want to pay attention to based on information you need at a glance. New reports are always being made, so keep in touch with your advisor and account manager to learn how best to use these tools. Focus Reports also live on the homepage but are more interactive – they allow you to change filtering with buttons and see the data shift in real time. Check out the Focus view on your homepage to see what’s available and to prioritize the reports you find most useful.9. Subject Views
There are several views within a subject record that can give you valuable information about some aspect of a driver and your company’s relationship with him. The Communication View, for example, shows a record of every point of contact with a driver, whether it’s a Pulse message, email, or phone call, to help you trace your relationship to that driver over time. You can even send messages to the driver directly through the Communication View to keep your relationship evolving with your driver! Another handy subject view is the Checklist View, which lets you monitor any checklists you’ve built to onboard or manage your drivers. Checklists can be shared with drivers and items on the checklist can be completed directly from the view to make processing a driver even easier. Different subject views can be found by opening a driver’s record and selecting the desired view from the dropdown at the top left.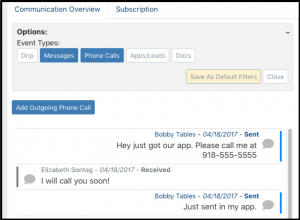
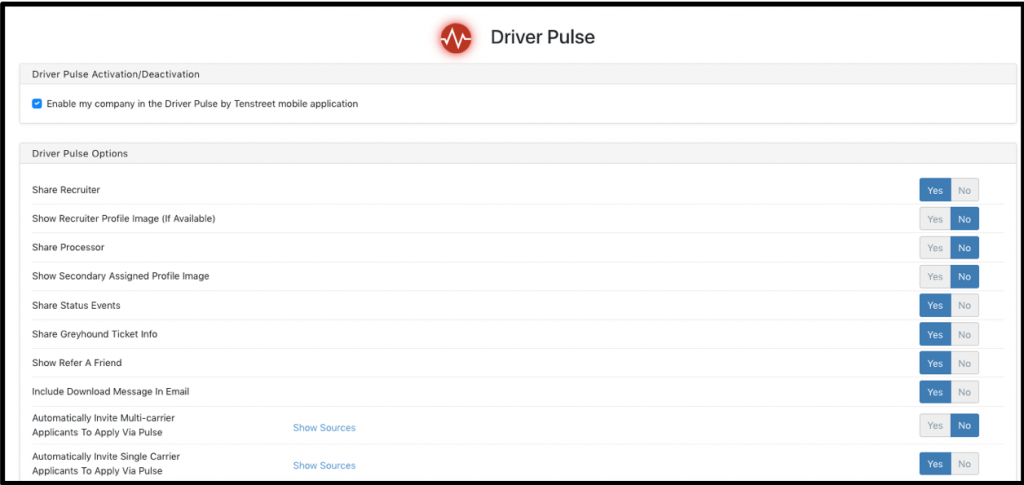
10. Pulse Controls
Pulse is a free and easy way to get your company in front of drivers – if you’re not using it, you’re making it harder for drivers to find and apply to you. Make sure that your company is visible to drivers on the Pulse app by selecting Pulse from your Tools menu and checking the box under Driver Pulse Activation/Deactivation to enable your mobile application and your company profile. You’ll find several other settings under the Pulse Controls to adjust how the app works for your company including how much information you share with drivers and what processes run automatically. You can do so many things through Driver Pulse, whether that’s sharing documents and reports with candidates, keep drivers up to date on their progress through your application process using checklists, message with applicants to set up interviews and orientation, and so much more. Connecting more closely with drivers and making their lives easier is one of the best secrets we know to having a thriving, successful adventure out on the road.