Leads here, leads there, leads everywhere. Getting leads from a variety of sources is a good problem to have since it gives you more possible candidates to vet, but the downside can be how difficult it is to assess candidates in different systems. It’s harder to be sure you’re getting the best talent when you have a stack of IntelliApps, a pile of Facebook ad responses, and a smattering of Hubspot leads all being reviewed separately. Getting all your leads into one pool lets you see clearly which drivers should take priority and where everyone falls in your process.
You might be raising your hand right now to tell us you don’t have the time to input leads from outside sources one by one (which you know because you’re already keying in all your outside leads as phone apps). We agree with you! That’s why we created the Import Tool, which is now available to all primary users.
How to Fill Your Pool
In the event you’ve collected a lot of leads outside your Dashboard and those leads are stored in a .csv file, uploading them is as simple as using the Import Tool. Here’s how to do it:- Go to your Tools menu and select the Import Tool.

- You’ll see three options – you can import leads from Facebook, Hubspot, or a custom .csv file. Select whichever type of leads you’re bringing in and you’ll see instructions on how to import the leads.Be sure to select the correct import option – leads imported through the Facebook or Hubspot option will be shown as “Facebook – Upload” or “Hubspot – Upload” in your attribution tracking, maintaining your visibility into where hires come from. Uploads from custom files will be shown as “Upload.”
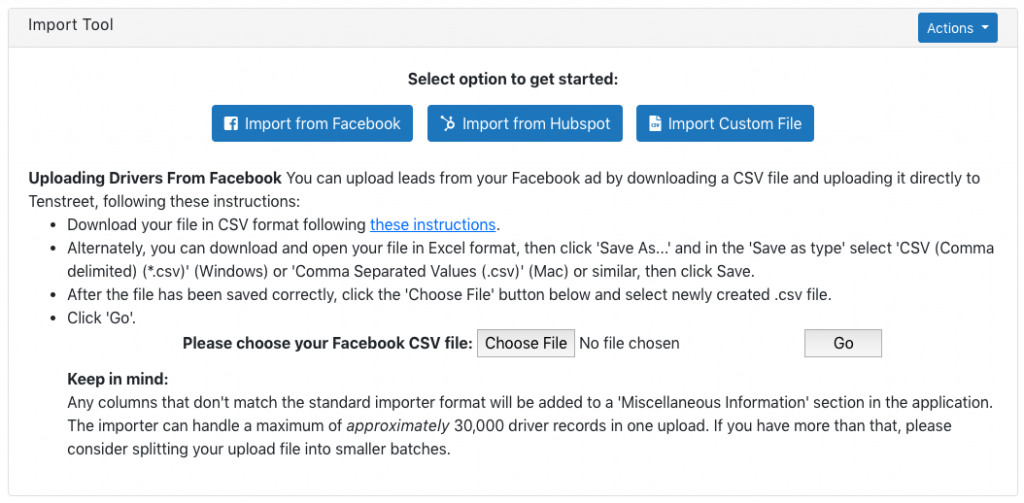
- Select your file with the Choose File button and then click the Go button.
- You’ll be taken to a new screen where you can see all the drivers detected in the file you’ve just selected. Select the drivers you wish to import by checking the box to the left of the id or select “Check All Pending” to select every driver who hasn’t been imported. Click the Import Selected button to begin the import.
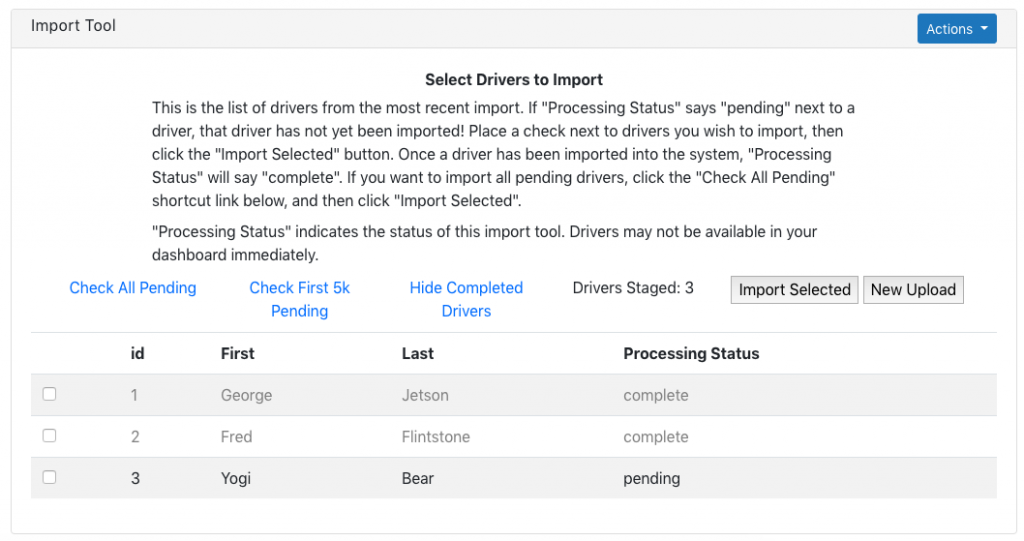
- Your drivers are now uploaded into Xpress! Drivers who were imported successfully will have “complete” under their processing status. You can click “Hide Completed Drivers” to remove them from your view. You can also set up routing for imported leads – contact your account manager to do so.